How To: Plant Cloning
14 Apr 2020
Plant cloning is the process of making a genetically identical plant through asexual propagation. It allows you to identify a plant that you really like, and make copies of it. While making a clone is not overly complicated, it is important to have a well-defined process and the proper tools.
Here's a quick list of the tools we'd recommend for successful cloning:
- A cup of water
- Rooting hormone (this can come in the form of a gel, powder or liquid)
- Scalpel or sharp snips
- Propagation tray
- Humidity dome
- Some type of insert like a 50 cell insert
- A neutral medium (such as coco coir, pro-mix, rockwool, oasis cubes or root plugs)
Now that you have your tools ready, the next step is to pick out a healthy mother plant. Make sure this plant has been watered thoroughly for at least two days.
The mother plant should have several strong, young branches. These will become your cuttings.
Choose your first branch and use your scalpel or snips to remove it as close to the stalk as possible. If you're taking multiple cuttings, you'll want to place them in a cup of water to prevent air from entering the cuttings.
Once you've taken all of cuttings, you're ready to clean them up before they are placed into a grow medium. To do this, remove the majority of lower foliage, leaving just the upper node and one or two leaves. Trim the tips of the upper leaves to reduce the amount of space your cuttings will take up and the amount of additional surface area that would be prone to pathogens. Cut the bottom of your clone at a 45 degree angle. Depending on the size of clone you're taking, ideally you want this cut to be immediately below the lowest node. I personally like my cuttings to be approximately the length of my pruning shears so they have a nice sturdy stem.
Once you've taken and cleaned up your cuttings, they are ready to be placed into a grow medium. We recommend using a grow medium with no nutrient content such as coco coir, pro-mix, rockwool, oasis cubes or root plugs. All work equally well. In this case, we are using coco that has been expanded in pH neutral water.
If you're using coco, you want to pack the expanded material as tightly as possible into your tray. This will provide support to the cuttings. Use your scissors to poke a hole in each cell, allowing room to place your cutting.
Select a cutting and dip the end directly into your rooting hormone. We are using Clonex rooting gel. Make sure the entire area where you made your 45 degree cut is covered and that the hormone is fully surrounding the stem.
At this point, you are ready to place the cutting in your grow media. Select a cell, place the cutting as far down as possible in the hole you made earlier. You can pack the media tightly around the stem for additional stability.
Once all of your cuttings are in place, add a humidity dome over the top of your tray, creating a moist, humid environment. This will assist in the development of roots over the next 1-2 weeks.
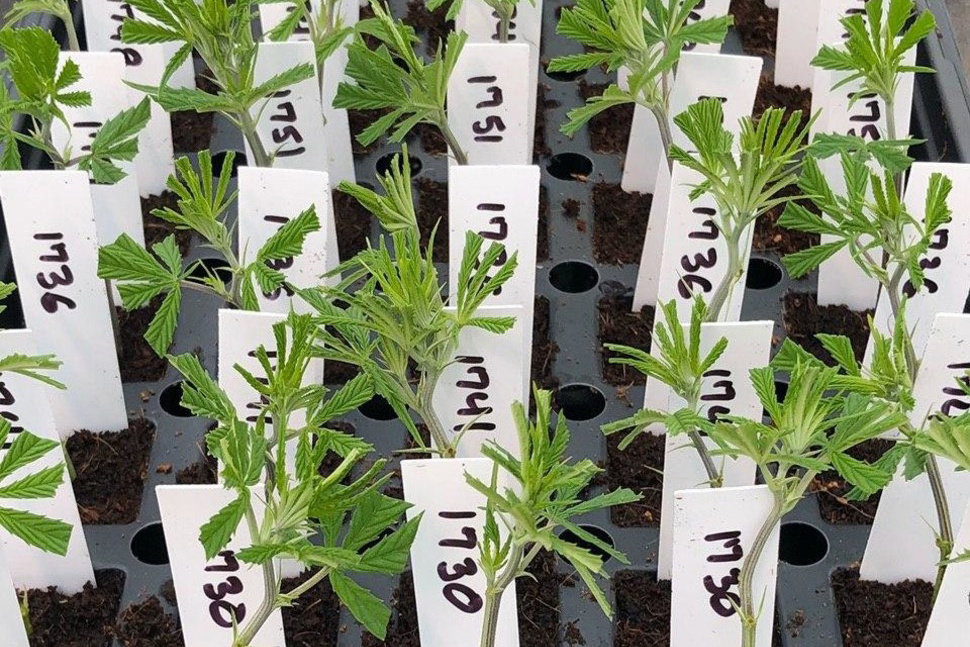
We recommend writing the date you took the cuttings with a permanent marker on a label stake and placing it in the tray with your clones. This will become important in helping you know when it's time to take the next steps.
If your humidity dome has vent holes, you'll want these to be fully closed on day 1. Place your tray in a room temperature environment under lights at low intensity (50-150 ppfd at the plant level should work just fine). You should notice by the end of the first day that condensation has collected on the inside of the dome.
Each day, open the dome slightly to allow fresh air to circulate for a few minutes and check to be sure that the grow medium is still damp and there is condensation built up inside. If things are starting to dry up, add 2 cups of water to the bottom of the tray and put the dome back on.
On the 10th day, open the vents on your dome 1/4 turn. On the 11th, open them 1/2. On the 12th, open them 3/4. On the 13th open them fully, and on the 14th day, remove the dome entirely. This process will help get your clones acclimated to the exterior environment. You should now begin to see roots sticking out from the bottom of the grow media.
The domes should remain off for the next 7 days as the plants continue to develop their root structure. You may see yellowing of some leaves. That's totally normal as the plant is putting its energy into root growth. If a few leaves droop dramatically and start to brown, you'll want to remove them to avoid mold or mildew issues.
By day 21, you are now ready to transplant your clones into a larger grow medium so they can begin their period of vegetative growth.
There are certainly many other methods that can be used for cloning, but we find this one to be consistently successful for both the novice and expert grower. The most important thing is that you have a clearly defined process and follow it each day.
Recent articles
View all
A Guide to Finding Top-Quality Genetics
11 Feb 2024
In this blog post, we will explore the essential factors to consider when shopping for quality cannabis genetics to ensure a successful and bountiful harvest....

Elevate Your Culinary Adventures
09 Feb 2024
Say goodbye to messy and time-consuming infusion methods! With the Magic Butter Machine, crafting your own infused products is a breeze. No more inconsistent results or tedious cleanup. Enjoy the conv...

What Do Plants Do In The Dark?
24 Dec 2020
A lot of attention is given to making sure plants receive enough good quality light to perform photosynthesis, but what happens when the lights go off?...